
Do your headlights look foggy and yellow, like they’re wearing sunglasses all the time? This isn’t just a looks problem; it’s a safety issue! Dim headlights make it harder to see the road at night, which can be really dangerous for you and others. You might be tempted to just buy new headlights, but that can cost a lot of money. Trying to pick the best DIY headlight restoration kit online can feel like navigating a maze. There are so many products, and it’s tough to know which one will actually work without wasting your time and cash.
But what if you could make your headlights crystal clear again, easily and affordably, right in your own driveway? This guide is here to help you do just that. We’ll break down the confusing world of DIY headlight restoration, showing you exactly what to look for and what to avoid. By the end, you’ll have the confidence to choose the right products and tackle the job yourself, saving money and making your car look and drive much safer.
Our Top 5 Diy Headlight Restoration Recommendations at a Glance
Top 5 Diy Headlight Restoration Detailed Reviews
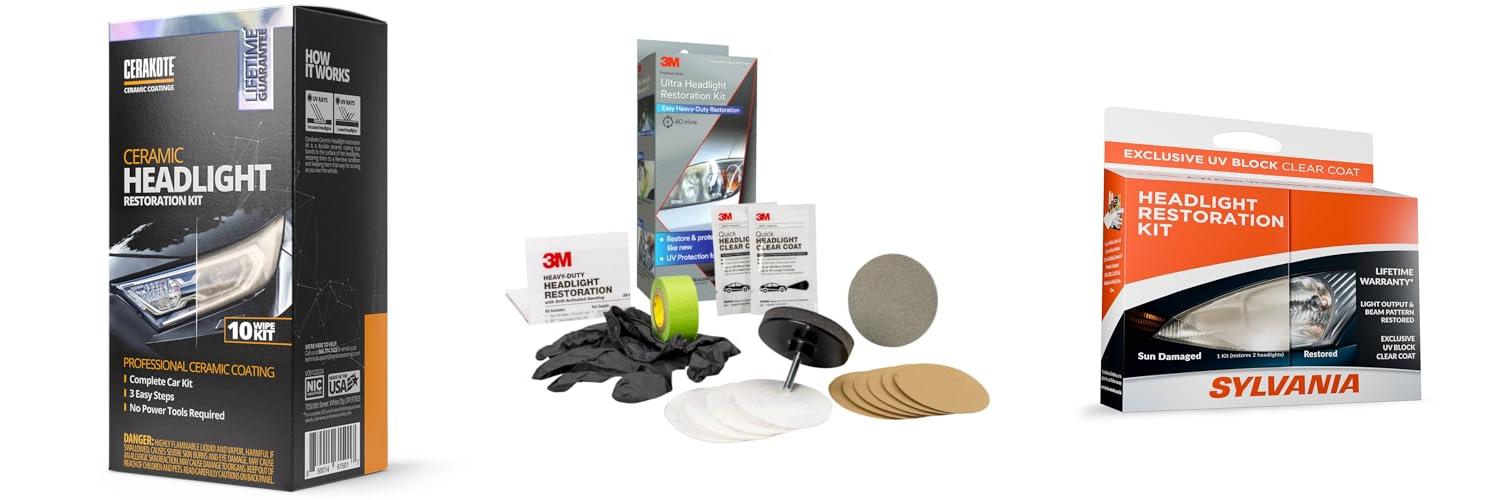
1. CERAKOTE® Ceramic Headlight Restoration Kit – Guaranteed To Last As Long As You Own Your Vehicle – Brings Headlights Back to Like New Condition – No Power Tools Required – 10 Wipe Kit

Rating: 9.1/10
Tired of foggy, yellow headlights that dim your drive? The CERAKOTE® Ceramic Headlight Restoration Kit is your answer. This kit guarantees to make your headlights look like new and keeps them that way for as long as you own your car. It’s a simple, no-power-tool solution that anyone can use. You get everything you need in one box to bring back clear vision and a sharp look to your vehicle.
What We Like:
- Lasting Shine: The ceramic coating bonds to your headlights, offering UV protection that lasts as long as you own your vehicle.
- Easy to Use: No power tools are needed, so you won’t accidentally damage your headlights or car paint.
- Simple 3-Step Process: In about 30 minutes, you can restore your headlights. First, oxidation remover wipes clear away the cloudiness. Then, sanding materials tackle any tough spots. Finally, the ceramic coating restores them to a like-new look.
- Trusted Technology: Cerakote is a leader in ceramic coatings, known for quality used by aerospace and automotive companies.
What Could Be Improved:
- Limited Kit Contents: While the kit includes 10 wipes, some users might wish for slightly more material for very large or heavily damaged headlights, though it’s designed for standard applications.
This kit offers a straightforward and effective way to restore your headlights. You can trust Cerakote’s advanced technology for a long-lasting, like-new finish.
2. 3M Ultra Headlight Restoration Kit

Rating: 9.0/10
The 3M Ultra Headlight Restoration Kit (39195) brings new life to dull, yellowed plastic lenses. This kit tackles headlights, taillights, fog lights, and more. It removes ugly buildup and yellowing without harming your car’s plastic. You can get a clear view again with this easy-to-use kit. It works on many plastic lenses, making your car look better and safer to drive.
What We Like:
- Comes with everything you need: masking tape, sanding discs, and wax protectant.
- Uses 3M’s special abrasive technology to safely remove yellowing and buildup.
- Easy to use, and some kits don’t even need extra tools.
- Restores plastic lenses like headlights, taillights, fog lights, and directional lights.
- Provides a heavy-duty restoration for a like-new look.
What Could Be Improved:
- The kit includes specific grit sanding discs; having a wider range might be helpful for very damaged lenses.
- While easy to use, some users might prefer a more detailed step-by-step visual guide.
This 3M kit makes restoring your car’s plastic lenses simple and effective. You can achieve a clear, like-new look with minimal effort.
3. SYLVANIA Headlight Restoration Kit – Long-Lasting Headlight Repair Kit for Restoring to Like-New Condition – Surface Activator

Rating: 9.4/10
Cloudy headlights can make driving at night feel like a guessing game. The SYLVANIA Headlight Restoration Kit is here to change that. This kit gives you everything you need to make your car’s headlights look brand new again. It’s designed to be super simple to use, so you don’t need any special tools. You can fix two headlight lenses and get much better light output. This means you can see the road clearly and drive more safely.
What We Like:
- It’s really easy to use.
- No special tools are needed.
- It fixes hazy and yellow headlights.
- It makes your headlights look like new.
- It helps you see better at night.
- The kit includes a special UV coating to protect your headlights.
- SYLVANIA has over 100 years of experience in lighting.
What Could Be Improved:
- The instructions could be a little clearer in some steps.
- For very old or heavily damaged headlights, you might need to do multiple applications.
This kit is a smart and affordable way to improve your car’s appearance and safety. Get ready to see the road ahead with confidence again.
4. Automotive Headlamp Restoration Fluid Kit

Rating: 8.7/10
The 2025 New Automotive Headlamp Restoration Fluid Oxidized Kit is a must-have for any car owner. This kit helps make your car’s headlights look like new again. It’s designed to remove the cloudy, yellow look that happens over time. This makes your car safer to drive at night.
What We Like:
- It makes cloudy headlights clear again.
- It improves your car’s visibility at night.
- You can see better and drive safer.
- It works fast, often in just minutes.
- You don’t need special tools to use it.
- Just spray and wipe for great results.
- It works on all kinds of cars, trucks, and SUVs.
- It works on both plastic and glass headlights.
- It makes your car look better and keeps its value.
- The results last a long time.
- It gives your headlights a professional shine.
What Could Be Improved:
- The kit only comes with one application.
- It might not work on very old or damaged headlights.
This headlight restoration kit is a simple way to make your car look better and drive safer. It’s a great addition to your car care supplies.
5. 3M Auto Restore and Protect Headlight Restoration Kit

Rating: 8.9/10
Foggy headlights can make your car look old and make it harder to see at night. The 3M Auto Restore and Protect Headlight Restoration Kit (39194) is a great way to fix this problem. It cleans and protects plastic lenses like headlights, taillights, and fog lights. This kit uses special sanding discs to remove yellowing and dirt without hurting the plastic. You can get a version that doesn’t need any tools, or one that works with a regular drill. It’s a much cheaper option than buying new headlight covers.
What We Like:
- Effectively removes yellowing and cloudiness from plastic lenses.
- Safe for use on headlights, taillights, fog lights, and more.
- Comes with everything you need, including sanding discs, clear coat wipes, a foam pad, and a glove.
- Easy to use, with tool-free and drill-compatible options available.
- Saves a lot of money compared to replacing headlight lenses.
- 3M’s abrasive technology works well without damaging the plastic.
What Could Be Improved:
- Results may vary depending on the severity of the headlight damage.
- The clear coat wipes might not last as long as a professional coating.
This kit offers a simple and cost-effective solution for restoring your car’s headlights. You can easily improve your car’s look and safety with this product.
Shine Bright: Your Guide to DIY Headlight Restoration
Are your car’s headlights looking dull and hazy? This can make driving at night unsafe. Yellowed or foggy headlights don’t let out as much light. Luckily, you can fix this yourself! DIY headlight restoration kits are a great way to bring back your headlights’ clarity. This guide will help you choose the best kit and get the job done right.
Key Features to Look For
When you’re shopping for a headlight restoration kit, keep these important features in mind.
Types of Restoration Methods
- Abrasion Kits: These kits use sandpaper or abrasive pads. You’ll sand away the damaged outer layer of the headlight. This is a very common and effective method.
- Chemical Kits: These kits use special chemicals. The chemicals dissolve the yellowed or oxidized plastic. They are often easier to use but might not work as well on heavily damaged headlights.
- Sealing/Coating Kits: After cleaning, these kits apply a protective coating. This coating prevents future yellowing and damage from the sun. This is a crucial step for long-lasting results.
Included Components
- Multiple Sanding Grits: Good kits offer a range of sandpaper grits. You start with coarser grits and move to finer ones. This ensures a smooth finish.
- Polishing Compound: A polishing compound helps to buff out any remaining haziness. It brings back the shine.
- Protective Sealant: As mentioned, a sealant is vital. It protects your newly restored headlights.
- Masking Tape: You’ll need tape to protect your car’s paint around the headlights. Some kits include this.
- Applicator Pads/Cloths: These are used for applying polishes and sealants.
Ease of Use
- Clear Instructions: The kit should have easy-to-understand, step-by-step directions. Pictures or diagrams help a lot.
- Minimal Tools Required: Most kits only need basic household items like water and rags.
Important Materials You’ll Need
While a kit has most things, you might need a few extra items.
- Water: You’ll use water for wet sanding.
- Clean Cloths or Microfiber Towels: Have plenty of these on hand for cleaning and drying.
- Gloves: Protect your hands from chemicals and sanding dust.
- Bucket: For water.
- Optional: Drill with Polishing Attachment: For some kits, a drill can make polishing faster and easier.
Factors That Improve or Reduce Quality
The quality of your restoration depends on a few things.
What Makes It Better:
- Thorough Cleaning: Make sure your headlights are clean before you start.
- Proper Sanding Technique: Follow the grit progression carefully. Don’t skip steps.
- Even Application of Sealant: Apply the sealant evenly. This ensures good protection.
- Sunny, Dry Weather: Restoration is best done on a warm, dry day.
What Makes It Worse:
- Skipping Sanding Steps: Using only one or two grits of sandpaper won’t give you a smooth finish.
- Not Applying Sealant: Without sealant, your headlights will likely turn yellow again quickly.
- Working in Damp Conditions: Water can interfere with the process.
- Rushing the Job: Take your time. Patience leads to better results.
User Experience and Use Cases
DIY headlight restoration is a rewarding project.
Who is this for?
- Car Owners: Anyone who wants to improve their car’s appearance and safety.
- Budget-Conscious Individuals: It’s much cheaper than buying new headlights.
- DIY Enthusiasts: People who enjoy fixing things themselves.
When to Use It:
- Dim Headlights: When you notice your headlights are not as bright as they used to be.
- Yellow or Hazy Appearance: When the plastic looks cloudy or discolored.
- Before Selling a Car: Restored headlights make a car look newer and more appealing.
- To Improve Night Driving Visibility: This is the most important reason. Clear headlights mean safer driving.
Frequently Asked Questions (FAQ)
Q: How long does a DIY headlight restoration usually take?
A: Most restorations take about 30 minutes to an hour per headlight. This includes sanding, polishing, and sealing. It depends on how bad the headlights are.
Q: How long do the results typically last?
A: With a good sealant applied, results can last anywhere from six months to two years. Proper reapplication of sealant can extend this time.
Q: Can I use a headlight restoration kit on plastic covers other than headlights?
A: Yes, you can use these kits on other clear plastic surfaces, like taillights or some motorcycle windshields. Always test on a small, hidden area first.
Q: Do I need any special tools for these kits?
A: Most kits are designed to be used by hand. Some advanced kits might suggest using a drill with a polishing pad, but it’s usually not required.
Q: What if the headlights are cracked? Can a kit fix that?
A: No, these kits can only fix haziness and yellowing. They cannot repair cracks or deep scratches in the plastic.
Q: Is wet sanding better than dry sanding?
A: Wet sanding is generally preferred for headlight restoration. It helps to keep the sandpaper from clogging and reduces dust. It also provides a smoother finish.
Q: How many times can I restore my headlights?
A: You can restore your headlights multiple times. However, each restoration removes a small layer of plastic. Doing it too often could weaken the headlight housing.
Q: What should I do if I get sealant on my car’s paint?
A: If you get sealant on your car’s paint, wipe it off immediately with a clean cloth. Most sealants are easy to remove if cleaned up quickly.
Q: Can I skip the sealant step?
A: It is strongly recommended that you do not skip the sealant step. The sealant protects the plastic from UV rays, which cause yellowing. Skipping it will mean your headlights will likely become hazy again very soon.
Q: Are there any risks involved in DIY headlight restoration?
A: The main risk is damaging the headlight if you sand too aggressively or skip important steps. Always follow the instructions carefully.
In conclusion, every product has unique features and benefits. We hope this review helps you decide if it meets your needs. An informed choice ensures the best experience.
If you have any questions or feedback, please share them in the comments. Your input helps everyone. Thank you for reading.