
Yes, you can absolutely get a car wash after window tint, provided you follow specific guidelines to ensure the longevity and integrity of your automotive window film. It’s crucial to know when and how to wash your tinted car to avoid damaging the tint.
When you invest in quality window tinting for your vehicle, you’re not just getting a stylish upgrade; you’re also adding a layer of protection against UV rays and heat. However, a common concern among car owners is how to maintain this new film. Specifically, many wonder about the proper procedures for a car wash after tinting. This guide will delve deep into the specifics of tint wash advice, covering everything from initial curing periods to recommended cleaning methods and what to avoid, ensuring your automotive window film care is impeccable. We’ll explore the nuances of a post tint wash and what constitutes a tint safe wash, even touching upon specific care for ceramic tint wash needs. Maintaining your tinted window cleaning regime is key to preserving the clarity and lifespan of your tint. We’ll also address the question of tinting after car wash and provide comprehensive auto window tinting maintenance tips for keeping your washing tinted car efforts effective.
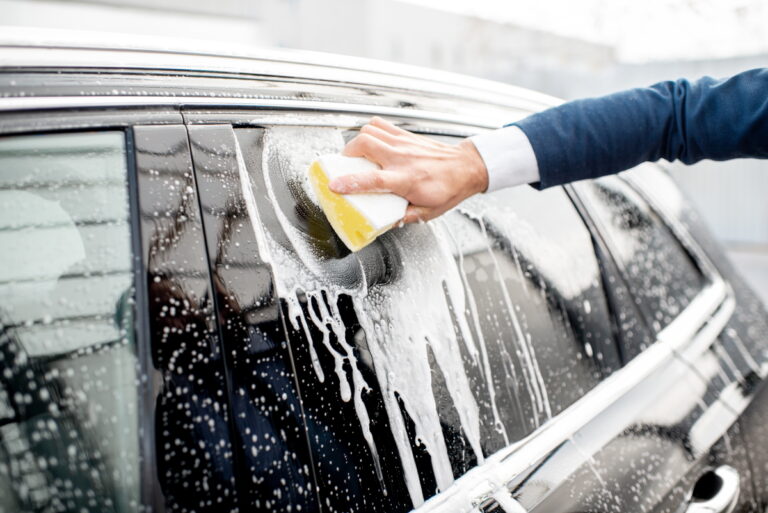
Image Source: qualityautoglasstint.com
Crucial Waiting Period Before Washing
One of the most critical aspects of car wash after tinting is the waiting period. Immediately after your automotive window film is applied, it needs time to cure. This curing process is vital for the adhesive to fully bond with the glass, ensuring the tint remains smooth, free of bubbles, and adheres properly for years to come. Rushing this process can lead to premature peeling, bubbling, or adhesion issues.
The Curing Timeline
The exact curing time can vary depending on several factors, including the type of tint, the adhesive used, environmental conditions (temperature and humidity), and the expertise of the installer. However, a general guideline is as follows:
- Initial Drying (24-48 Hours): Within the first 24 to 48 hours, the visible water and adhesive solution should evaporate. The tint might appear slightly hazy or have small water pockets during this phase. Resist the urge to touch or press on these areas.
- Partial Curing (1-2 Weeks): Over the next one to two weeks, the adhesive will continue to bond. While the tint will look clearer, it’s still susceptible to damage from aggressive cleaning or high-pressure water.
- Full Curing (30-90 Days): Complete curing can take anywhere from 30 to 90 days. During this period, the tint achieves its maximum adhesion and durability.
Recommendation: Most professional tint shops advise waiting at least 48 to 72 hours before exposing your vehicle to any form of washing, including a gentle rinse. However, for complete peace of mind and to ensure optimal bonding, waiting two weeks is often recommended, especially before undertaking a thorough wash. Always consult your tint installer for their specific recommendations based on the products they used.
What Constitutes a Tint Safe Wash?
When it’s time to clean your tinted vehicle, employing the right techniques is paramount. A tint safe wash focuses on gentle methods that won’t compromise the integrity of the window film.
Gentle Exterior Washing
For the exterior of your vehicle, standard car washing practices are generally acceptable once the tint has had sufficient time to cure. However, when it comes to the windows themselves, extra care is needed.
- Use pH-Neutral Soaps: Opt for car wash soaps that are specifically labeled as pH-neutral or “tint safe.” Harsh detergents can break down the adhesive or damage the film’s surface.
- Microfiber Mitts and Towels: Always use clean microfiber wash mitts and drying towels. These materials are soft and won’t scratch the tint or the paintwork. Avoid abrasive sponges or brushes.
- Two-Bucket Method: To minimize the risk of scratching, use the two-bucket method. One bucket contains soapy water, and the other contains clean rinse water for your wash mitt. This prevents transferring grit from the dirty mitt back onto the car.
- Avoid High-Pressure Washers on Edges: While a gentle rinse from a pressure washer might be acceptable from a distance for the body of the car, direct high-pressure jets, especially near the edges of the window tint, can force water underneath the film, potentially causing lifting or peeling.
Interior Window Cleaning: The Delicate Touch
Cleaning the interior of your tinted windows requires even more caution. This is where most of the direct interaction with the tint surface occurs.
- Gentle Cleaning Solutions: Use a mixture of distilled water and a small amount of mild, ammonia-free glass cleaner. Ammonia is a powerful solvent that can degrade window tint, especially dyed films. You can also use a simple solution of distilled water and a drop of baby shampoo.
- Ammonia-Free is Key: Reinforcing this, always ensure your cleaning solution is ammonia-free. This is a critical rule for tinted window cleaning.
- Microfiber Cloths, Again: Use clean, soft microfiber cloths for both cleaning and drying the interior windows. Have at least two cloths – one for applying the cleaner and one for drying and buffing.
- Circular or Vertical Strokes: When cleaning, use gentle, overlapping strokes. Some prefer circular motions, while others opt for vertical or horizontal wipes. The key is to avoid excessive pressure and to cover the entire surface evenly.
- Avoid Sharp Objects: Never use razor blades, scrapers, or abrasive pads to clean tinted windows. These can easily scratch or peel the film.
What to Avoid When Washing Tinted Windows
Knowing what not to do is as important as knowing what to do. Certain actions can quickly ruin your window tint.
High-Pressure Washing and Steam Cleaning
- High-Pressure Washers: While a gentle rinse might be okay from a distance for the car’s body, direct, high-pressure spray on the edges of tinted windows can be detrimental. It can force water and dirt under the film, causing it to lift or bubble. This is a significant concern for washing tinted car windows.
- Steam Cleaners: The heat and moisture generated by steam cleaners can also damage the adhesive and the film itself. Avoid using steam cleaners directly on tinted windows, both inside and out.
Harsh Chemicals and Abrasive Materials
- Ammonia-Based Cleaners: As mentioned, ammonia is the enemy of window tint. It will break down the adhesive and the tint material over time, leading to discoloration, peeling, or bubbling. This is a crucial aspect of automotive window film care.
- Abrasive Cleaners or Pads: Never use scouring pads, steel wool, ammonia-based window cleaners, or any abrasive cleaning products. These will scratch and damage the surface of the tint film, reducing clarity and visibility.
Excessive Scrubbing or Pressure
- Hard Scrubbing: Applying too much pressure when cleaning can displace the tint or push the adhesive away from the glass, leading to the formation of bubbles or lifting edges. Gentle wiping is the best approach for tinted window cleaning.
Leaving Water Spots
- Immediate Drying: After washing, it’s important to dry the windows promptly to prevent water spots from forming. Water spots can etch into the film over time, especially if they contain minerals.
Specific Care for Ceramic Tint Wash
Ceramic tint wash requires the same gentle approach as standard tint, with an added awareness of the ceramic particles. Ceramic tints are known for their durability and heat rejection properties. While they are generally more robust, harsh cleaning methods can still degrade the hydrophobic properties and the film itself.
- Maintain Gentleness: The same principles of using pH-neutral soaps, microfiber towels, and avoiding ammonia apply to ceramic tints.
- Specialized Ceramic Cleaners: Some manufacturers offer specialized ceramic-coating cleaners or car wash soaps that are formulated to be safe for ceramic tints and coatings. These can help preserve the hydrophobic properties of the ceramic tint.
- Avoid Wax or Sealants Unless Specified: Do not apply traditional car waxes or sealants to your window tint unless explicitly recommended by the tint manufacturer. These products are designed for paint and can interfere with the optical clarity or adhesion of the tint.
Professional vs. DIY Car Washing After Tinting
Deciding whether to opt for a professional car wash or tackle it yourself is a common consideration after auto window tinting maintenance.
Professional Car Washes
When considering professional services for washing tinted car windows, be discerning:
- Touchless Car Washes: These are generally considered safer for tinted windows than automatic car washes with brushes. The high-pressure water jets still require caution near the edges.
- Full-Service Detailers: A reputable auto detailer experienced with tinted vehicles will know the proper procedures. It’s always best to confirm their practices and products used for tint safe wash services. Explicitly mention you have window tint and inquire about their methods.
DIY Washing
DIY washing allows you complete control:
- Controlled Environment: You can wash your car in a shaded area, which is ideal for preventing water from drying too quickly on the windows.
- Cost-Effective: Doing it yourself can save money.
- Personalized Care: You can ensure only the gentlest products and techniques are used, providing the most meticulous automotive window film care.
Important Considerations for Tinting After Car Wash
While the focus is usually on washing after tinting, it’s worth noting the reverse:
- Avoid Tinting Immediately After a Wash: If you’re getting your car tinted, ensure the windows are thoroughly cleaned and dried by the professional installer. You should not attempt to wash your car right before a tinting appointment, as residual soap or dirt could interfere with the tint application.
Maintaining Clarity and Longevity: Auto Window Tinting Maintenance
Proper auto window tinting maintenance extends beyond just washing. Here are some additional tips:
- Regular Dusting: For light dust accumulation on interior windows, a dry microfiber cloth can often suffice for a gentle dusting.
- Address Spots Promptly: If you notice bird droppings, bug splatters, or sap on exterior windows, clean them as soon as possible with a tint safe wash solution. Letting these substances bake onto the tint can make them harder to remove and may require more vigorous cleaning.
- Window Defoggers/Defrosters: When using your car’s defroster system, ensure it’s not overly aggressive with heat, particularly in extreme cold weather immediately after tinting. However, once fully cured, standard defroster use is fine.
- Avoid Rolling Down Windows (Initially): Professional installers often recommend keeping windows rolled up for the first 24-48 hours to prevent the edges of the film from snagging or lifting.
A Quick Reference Table for Tint Safe Washing
To make it easier to remember the key points for washing tinted car windows, here’s a helpful table:
| Action | Recommended | To Avoid |
|---|---|---|
| Waiting Period | At least 48-72 hours; 2 weeks for full confidence. | Washing immediately after tinting. |
| Cleaning Solution | Ammonia-free glass cleaner, distilled water, mild baby shampoo. | Ammonia-based cleaners, harsh detergents, abrasive cleaners. |
| Washing Tools | Clean microfiber cloths, microfiber wash mitts. | Paper towels, abrasive sponges, rough cloths, steel wool, razor blades. |
| Washing Technique | Gentle wiping, light pressure. | High-pressure washers directly on edges, excessive scrubbing, steam cleaning. |
| Interior Cleaning | Gentle spray and wipe. | Spraying cleaner directly onto the tint (spray cloth instead). |
| Drying | Clean, dry microfiber cloths. | Letting windows air dry, leaving water spots. |
| Exterior Bugs/Tar/Sap | Prompt cleaning with tint-safe soap and water. | Leaving them on for extended periods, using harsh solvents. |
| Automatic Car Washes | Touchless washes are preferable. | Washes with brushes that can scratch or snag tint edges. |
Frequently Asked Questions (FAQ)
Q1: How long should I wait before washing my car after getting the windows tinted?
A: It’s generally advised to wait at least 48-72 hours. For optimal results and to ensure full adhesion, waiting two weeks is even better. Always check with your installer for their specific recommendations.
Q2: Can I use Windex on my tinted windows?
A: No, unless the Windex is specifically labeled as ammonia-free. Standard Windex contains ammonia, which can damage window tint.
Q3: Is it okay to go through an automatic car wash after tinting?
A: It’s best to avoid automatic car washes with brushes. Touchless automatic washes are generally safer, but it’s still best to wait until the tint is fully cured and avoid high-pressure spray directly on the window edges.
Q4: What’s the best way to clean the inside of my tinted windows?
A: Use a clean microfiber cloth sprayed with an ammonia-free glass cleaner or a solution of distilled water and a drop of baby shampoo. Gently wipe the glass.
Q5: Will a pressure washer damage my window tint?
A: High-pressure washers can be risky, especially if the spray is directed at the edges of the tint. The high pressure can force water underneath the film, causing it to lift or bubble. A gentle rinse from a distance for the car body is usually fine, but direct, close-range spraying on the tint is not recommended.
Q6: Can I use a razor blade to remove stickers or debris from tinted windows?
A: Absolutely not. A razor blade will scratch and likely peel the tint film. Use your fingers or a plastic scraper for stubborn debris, and only on fully cured tint.
Q7: What if I see small bubbles or haze after tinting?
A: This is often normal during the curing process. Small water pockets can take a few weeks to evaporate. However, if you see large bubbles or the tint is peeling from the edges, contact your installer.
By adhering to these guidelines for car wash after tinting, you can ensure your window tint remains clear, vibrant, and protective for many years, maintaining the aesthetic and functional benefits of your investment. Proper tint wash advice and diligent automotive window film care will keep your car looking its best.